Homemade Mochi Ice Cream Recipe
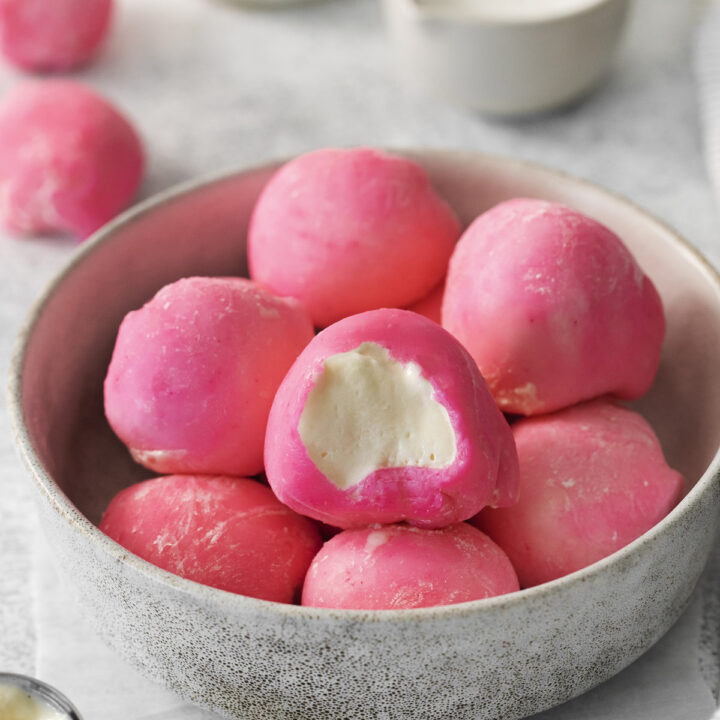
A sweet, soft, and chewy rice flour coating surrounds creamy vanilla ice cream in these fun and unique Mochi Ice Cream. This mochi ice cream recipe is simple to make, and readers are saying they love this recipe.
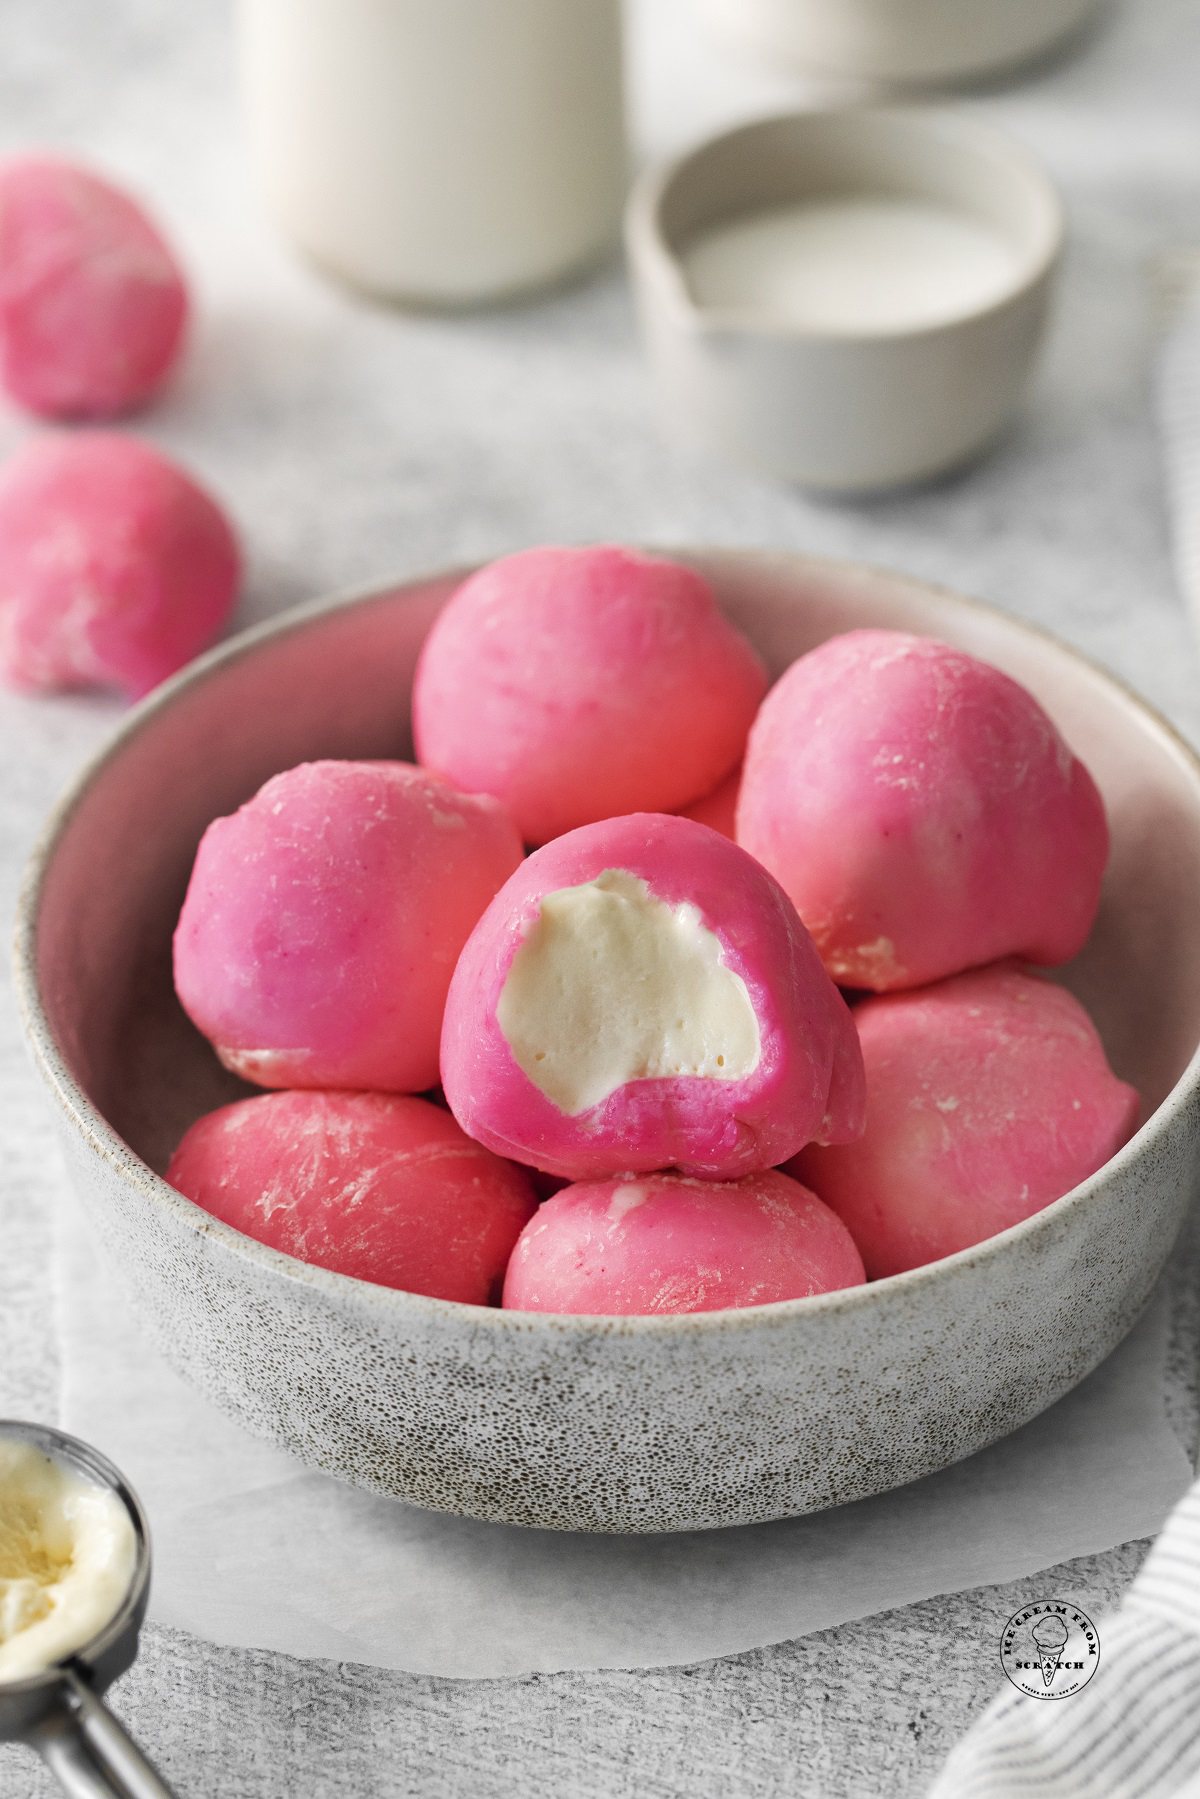
You can find mochi ice cream desserts filled with common American flavors like vanilla bean ice cream, strawberry ice cream, and chocolate ice cream.
But you can also find fun and interesting Japanese favorites like matcha ice cream, black sesame, and red bean!
This recipe for Mochi Ice Cream starts simple, with an inner filling made from vanilla ice cream, and a sweet coating that is much easier to make than you might think.
Why You’re Going to Love This Mochi Ice Cream Recipe
- This recipe is as simple as it gets. You can use store-bought ice cream to make it simpler.
- We’re using real ingredients, and keeping it as minimal as possible.
- You don’t need any special equipment to make Mochi.
- They are colorful and fun.
- Making mochi at home can save you money vs. what they typically cost at the grocery store.
Mochi at the grocery store is often over $6 for a box of 8 or 12 pieces, which is a huge markup from what the ingredients actually cost. This recipe makes 14 individual mochi balls, for less than $2, and that’s if I order the specialty flour needed for this recipe on Amazon.
You can save your hard-earned cash by DIYing other ice cream desserts too. Try making a homemade ice cream cake rather than buying one, or blend up chocolate milkshakes at home rather than hitting the drive-through!
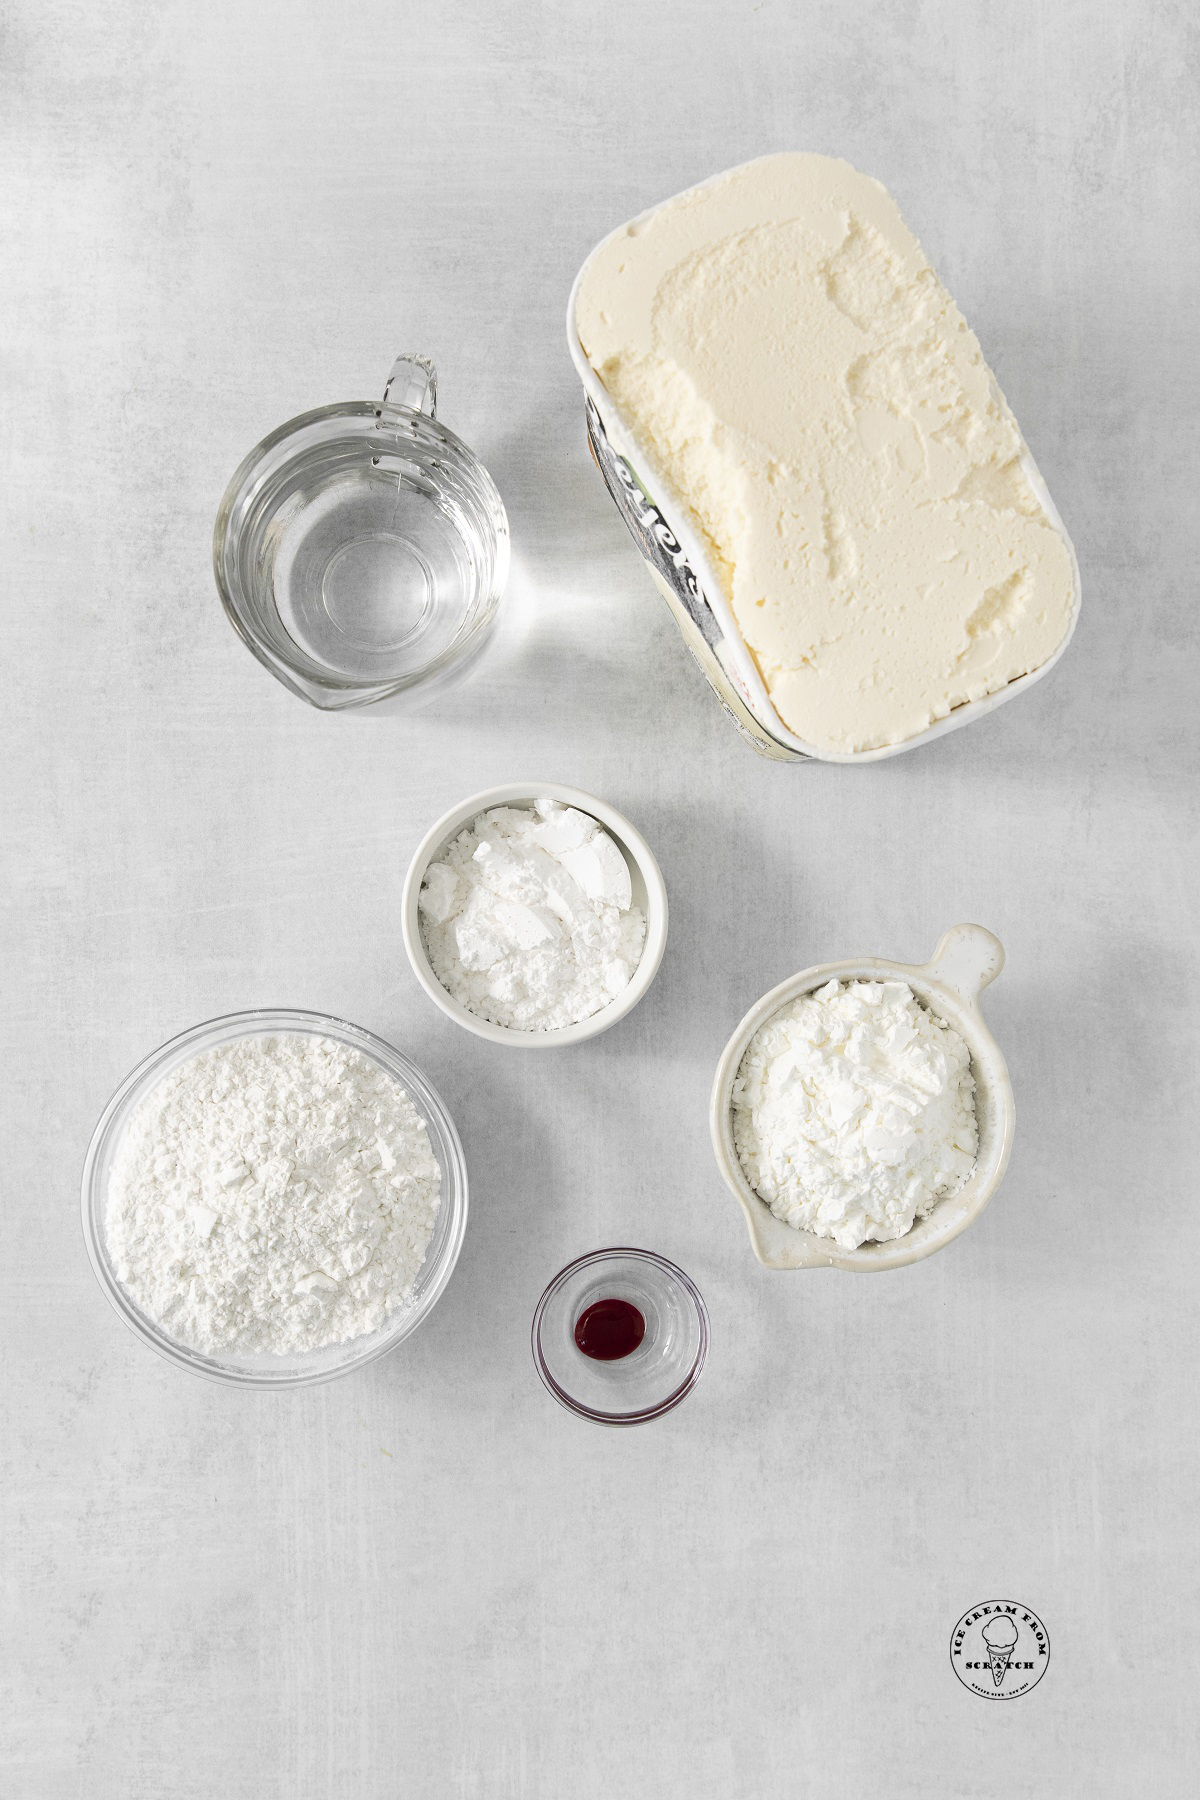
Ingredients in Homemade Mochi Ice Cream
- Vanilla Ice Cream – Use your favorite, but be sure that it’s a good quality brand or homemade. Since each mochi only has a little bit of ice cream inside of it, you want it to be the best.
- Glutinous Rice Flour – This is the most important ingredient in homemade mochi. The chewy outer coating relies on this sticky rice flour for its texture and its ability to be turned into an easily workable dough.
- Powdered Sugar – This gives the mochi coating a subtle sweetness. Be sure to use powdered sugar, as granulated sugar won’t incorporate into the rice dough.
- Corn Starch – This will help you to roll out the rice flour dough without it sticking to your countertops! While you might think you can use regular flour, don’t. The flour won’t get cooked, and it will leave a less-than-tasty texture on the mochi.
- Pink Food Coloring – This is optional, but I love how cute and fun these are in bubblegum pink! You can also use any other color that you want.
- You need a cup of water as well to bind everything together!
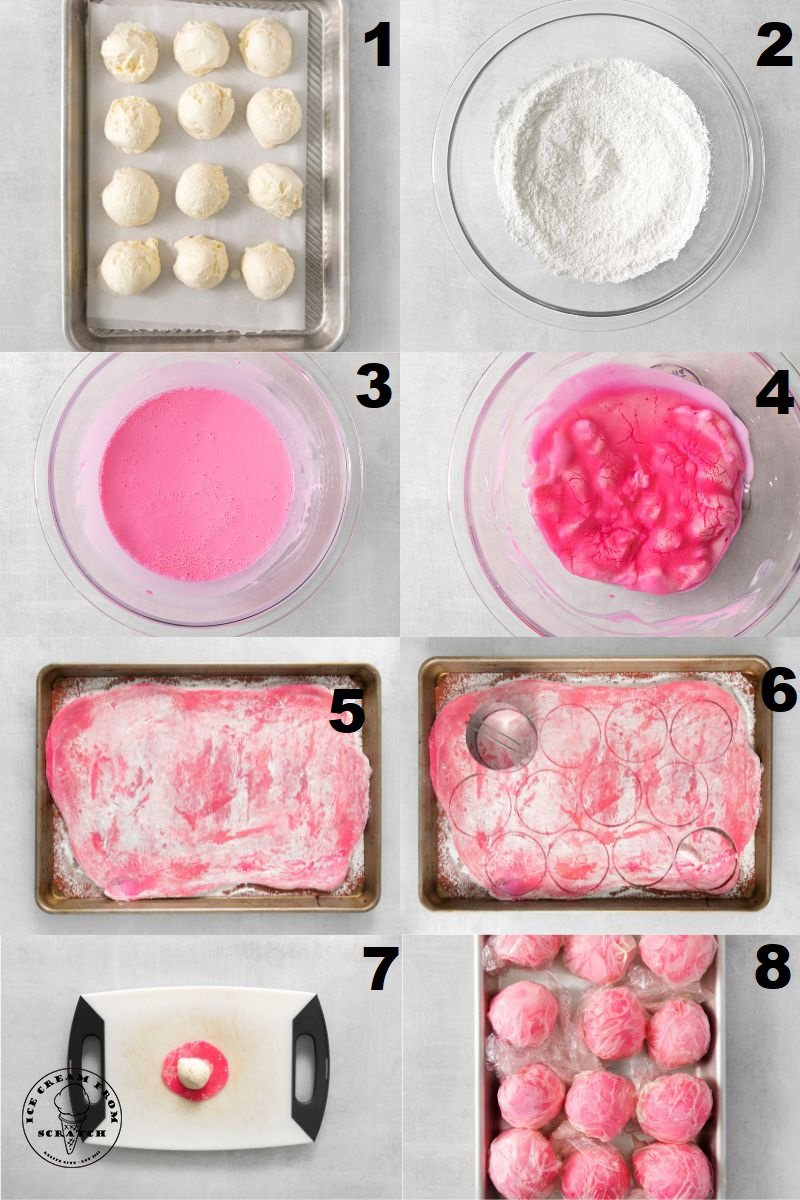
How to Make Mochi Ice Cream from Scratch
- Line a sheet pan with parchment paper, and scoop out tablespoon-sized balls of ice cream onto it. Each ball should be about the size of a ping-pong ball. Place the tray of ice cream into the freezer to chill for at least an hour, or until completely firm.
- To make the dough, add the glutinous rice flour and powdered sugar to a medium microwave-safe bowl and whisk to combine.
- Add the food coloring to the water first, then slowly add the water to the rice flour mixture, whisking constantly until blended.
- Microwave the mochi dough for 90 seconds. Then stir with a rubber spatula and microwave again for 60 seconds. At this point, the dough will have thickened, and it will be very hot!
- Dust a non-stick work surface (I suggest a Silpat mat) heavily with cornstarch. Carefully transfer the hot mochi dough to the surface. Sprinkle the top with more cornstarch, and roll it out to just barely ¼” thick. Chill the rolled dough in the fridge until it’s cool to the touch, about 30 minutes.
- When the mochi dough has chilled, remove it from the fridge and cut out as many 2.5” circles as you can. The dough can’t really be re-rolled, so try to cut the circles as close together as possible.
- Brush off any excess cornstarch from each circle, then wrap it around a frozen ball of ice cream. Pinch the seams together at the bottom.
- Wrap each mochi ball with plastic wrap, and place them back into the freezer for 2 hours or until set.
These numbered steps match the numbered photos above and are for illustration purposes. For the complete list of ingredients and instructions, please see the recipe below.
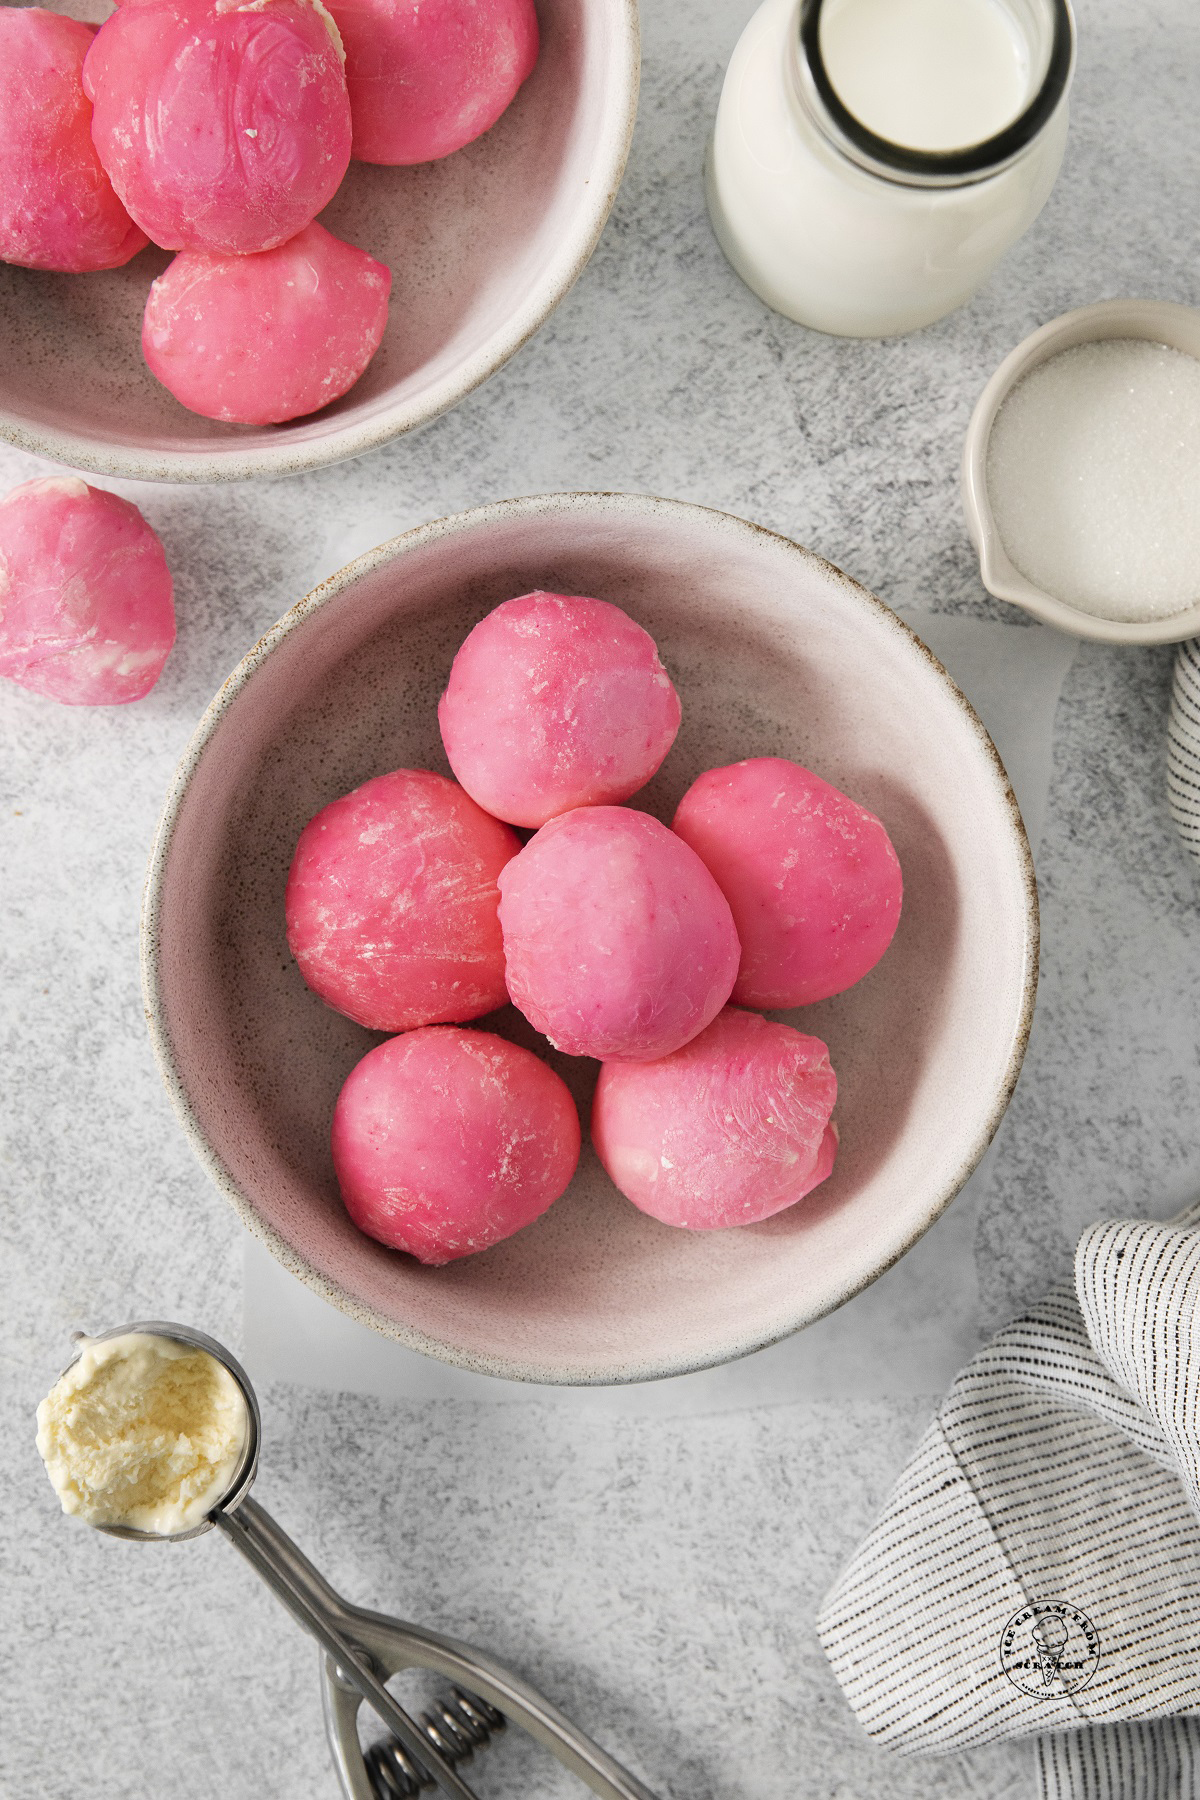
How to Store Homemade Mochi
Keep the mochi wrapped individually with plastic wrap in an airtight container in the freezer. They can be stored this way for up to 1 week. You’ll want to let the mochi sit out at room temperature for a few minutes to soften before biting into them!
Mochi Ice Cream Tips
- Use quality ingredients – Since these ice cream desserts are small and simple, you should be sure that you are using good quality ice cream.
- Chill out –There are multiple chilling steps in this recipe – be sure not to skip any of them! The success of this mochi ice cream recipe depends on the ice cream being very cold and the dough being the right temperature to wrap around it.
- Corn starch is your friend – Dough made from sticky rice flour is, well, sticky! It will stick to your hands, your tools, and your surface. Don’t be afraid to use a lot of it to help.
- Try other flavors – Instead of vanilla ice cream, fill your mochi with any flavor of ice cream you can imagine!
- To make this recipe dairy free – Use your favorite non-dairy ice cream as the filling.
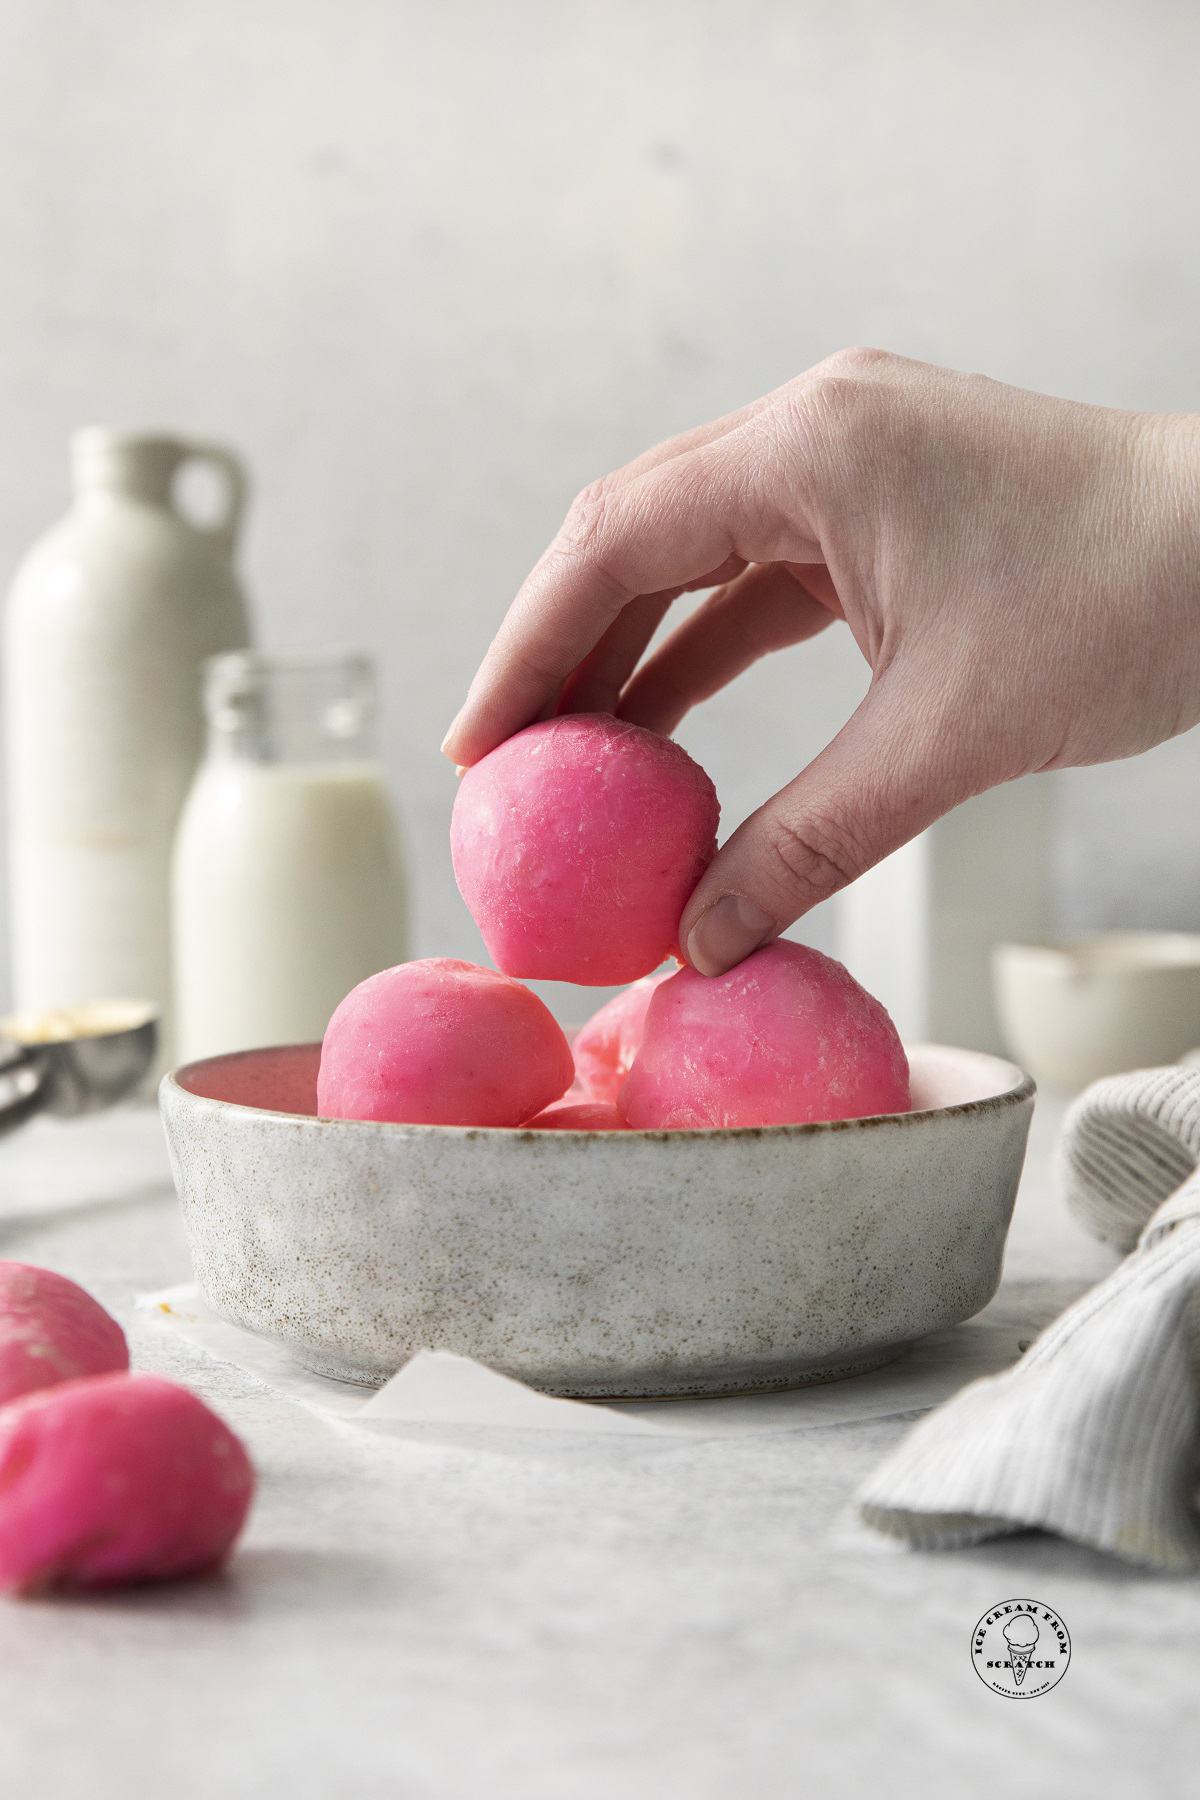
More Homemade Ice Cream Dessert Recipes:
- Rolled Ice Cream
- Rainbow Sherbet
- Butter Pecan Ice Cream Sandwiches
- Mexican Ice Cream
- Ice Cream Pizza
If you’re looking for another mochi recipe, try this Pumpkin Butter Mochi next.
LET’S GET SOCIAL, you can follow us on Pinterest or leave a comment below if you have any questions.
Did you make this Homemade Mochi Ice Cream Recipe? Leave a Comment Below letting us know what you thought and if you added any additional add-ins.
Easy Mochi Ice Cream Recipe
Use this easy recipe to make Mochi Ice Cream, the Japanese frozen treats with sweet, soft, and chewy rice flour coating around creamy vanilla ice cream.
Ingredients
- 2 cups vanilla ice cream (or another flavor)
- 1 cup glutinous rice flour
- ¼ cup powdered sugar
- 1 cup water
- ⅛ teaspoon pink food coloring (optional)
- ½ cup cornstarch, for dusting your work surface
Instructions
- Line a quarter sheet pan with parchment paper and scoop out tablespoon sized balls of ice cream (you should get about 12 ping pong ball sized portions). Place the ice cream balls on the parchment and then place them in the freezer to chill until completely firm– at least 1 hour.
- Add the glutinous rice flour and powdered sugar to a medium-sized microwave safe bowl and whisk to combine.
- Add the food coloring to the water and stir to combine. Slowly add the water to the rice flour, whisking constantly until completely combined.
- Microwave the mochi dough for 90 seconds. Then stir it with a rubber spatula and microwave it for an additional 60 seconds. The dough should have thickened and it will be very hot!
- Place a silpat mat on your work surface and dust it heavily with cornstarch. Use the rubber spatula to transfer the mochi dough from the bowl to the silpat (be careful– it will be hot!). If you don’t have a silpat mat, parchment paper will work too.
- Dust the mochi dough thoroughly with cornstarch and then roll out to just barely ¼” thick. Slide the silpat onto a rimmed baking sheet and place the mochi dough in the fridge to chill until it is cool to the touch– about 30 minutes.
- When the mochi dough has chilled, remove it from the fridge and cut out as many 2.5” circles as you can (try to get as many mochi rounds as you have ice cream balls). You can’t re-roll mochi dough so make sure to put your cut-outs very close together!
- Brush off any excess cornstarch from your mochi dough and then wrap it around a ball of ice cream and pinch the seams to seal in the ice cream. Wrap the mochi in plastic wrap and place it in the freezer. Repeat with the remaining mochi.
- Allow the assembled mochi to chill the freezer until firm and set– at least 2 hours. Enjoy.
Notes
- Use quality ingredients – Since these ice cream desserts are small and simple, you should be sure that you are using good quality ice cream.
- Chill out –There are multiple chilling steps in this recipe - be sure not to skip any of them! The success of this mochi ice cream recipe depends on the ice cream being very cold and the dough being the right temperature to wrap around it.
- Corn starch is your friend – Dough made from sticky rice flour is, well, sticky! It will stick to your hands, your tools, and your surface. Don't be afraid to use a lot of it to help.
Nutrition Information:
Yield: 14 Serving Size: 1Amount Per Serving: Calories: 109Total Fat: 2gSaturated Fat: 1gTrans Fat: 0gUnsaturated Fat: 1gCholesterol: 8mgSodium: 17mgCarbohydrates: 20gFiber: 1gSugar: 6gProtein: 2g

