Baked Alaska
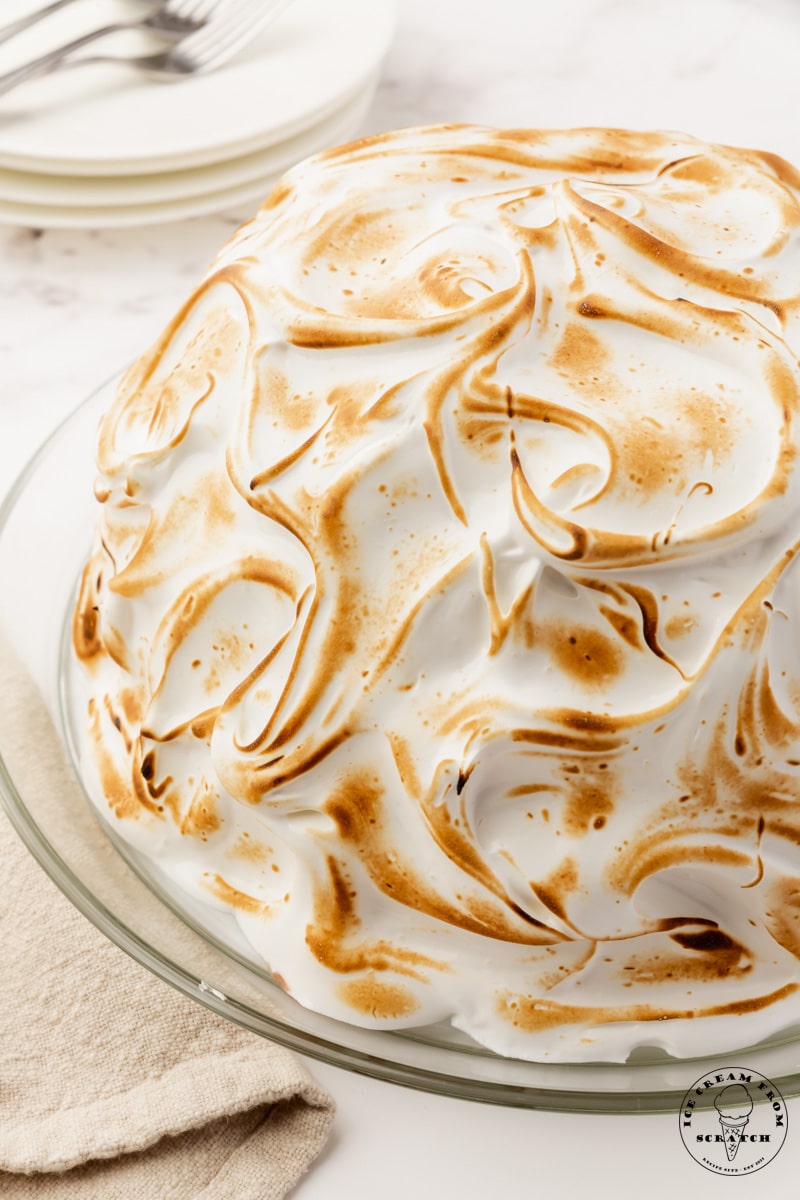
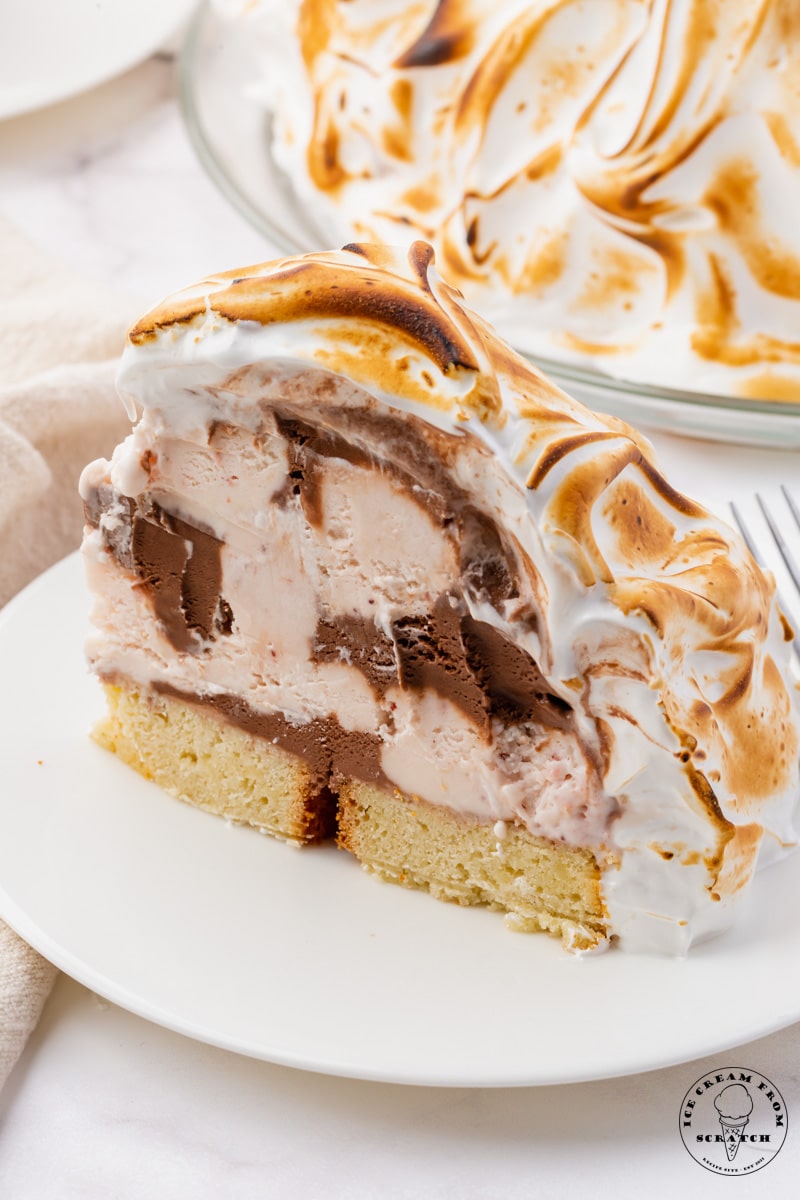
Baked Alaska is an impressive and easy ice cream dessert. Layers of cake, ice cream, and toasted meringue come together flawlessly to make this tasty treat.
It’s a wonderful ice cream and cake combo to serve guests at a dinner party, after a holiday meal, or as a special dessert for your family.
Everyone will be amazed that you made this dome ice cream cake yourself, and it’s easy to do with our Baked Alaska recipe.
Why You’re Going to Love this Baked Alaska Recipe
Semi-Homemade Dessert – You can bake a pound cake from scratch if you like, but Baked Alaska is easiest to make with store-bought cake slices. The same goes for the ice cream – make it from scratch or pick up your favorite chocolate and strawberry ice creams from the grocery store.
It’s Fancy! Baked Alaska is served for dessert in restaurants because it’s super impressive. Some fancy restaurants serve it as “Bombe Alaska” and will flambé the whole thing with rum right at the table! Toasty meringue clouds wrapped around ice cream and cake are a dessert that looks hard to accomplish, but it’s really pretty easy once you get the hang of the process.
Easy to Adjust – Swap out the chocolate or strawberry ice cream for your other favorite ice cream flavors. You can use chocolate cake instead of pound cake, or even baked brownies!
We have more easy ice cream dessert recipes! Make sure to try Fried Ice Cream and Apple Pie a la Mode too.
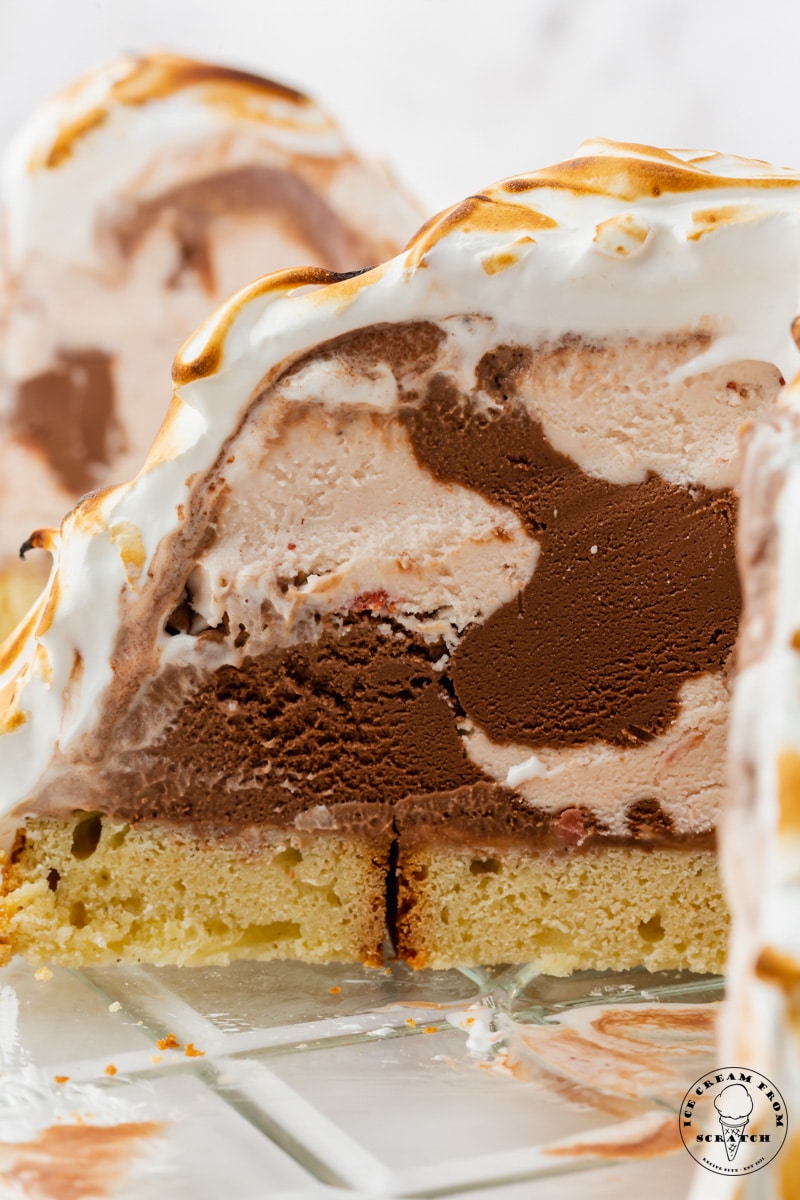
What is Baked Alaska?
Baked Alaska is an ice cream dessert, that typically consists of ice cream and cake, covered in whipped meringue that has been briefly baked or torched to brown the eggs.
Credit for creating this dish is often given to Delmonico’s restaurant in New York City, said to be one of the country’s first fine dining restaurants. They also lay claim to the creation of the wedge salad, eggs benedict, and lobster Newberg. All of the fanciest recipes started there!
It’s said that Baked Alaska was created to celebrate the United States’ acquisition of Alaska in 1867.
Also in 1867, a very similar dessert was created during the Paris World’s Fair at the Grand Hotel. The chef called it a Norwegian Omelette. I suppose that’s because it’s very cold in Norway and this cold dessert is topped with egg whites!
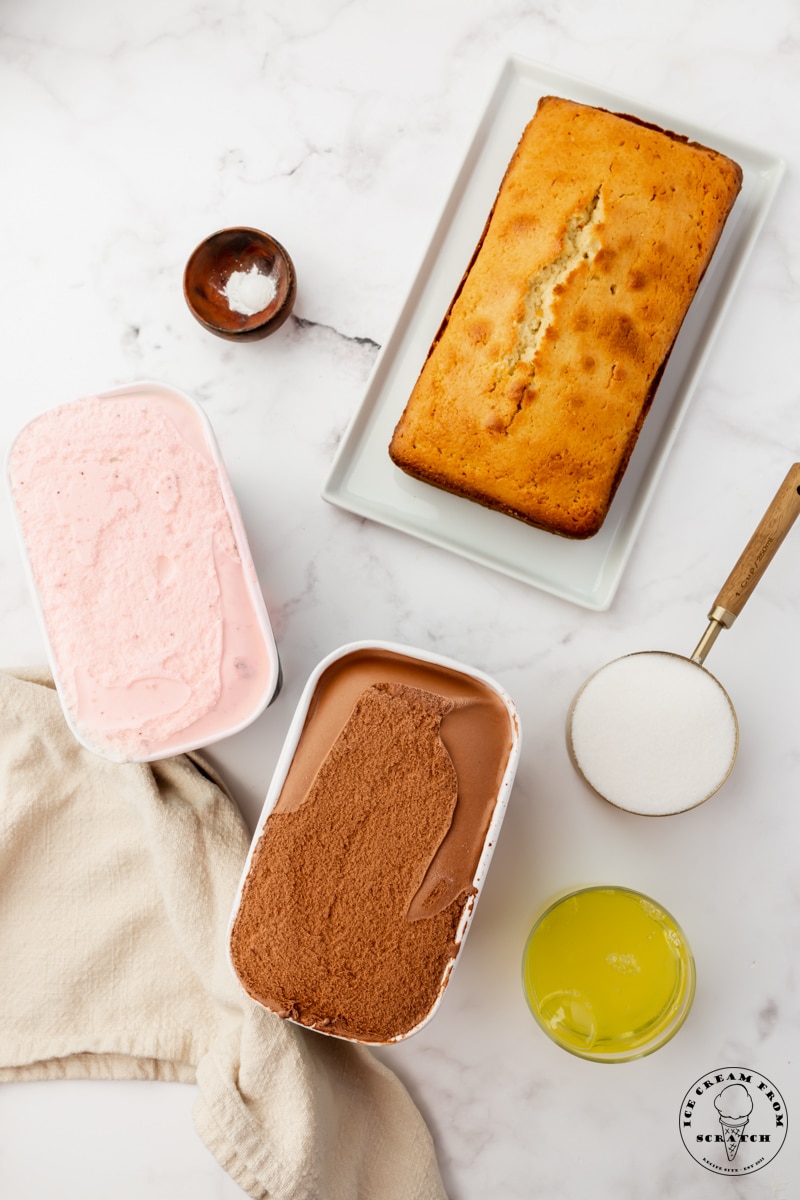
Ingredients in Homemade Baked Alaska
You’ll need a 9-inch mixing bowl to assemble homemade baked Alaska. If you have a 2.5 quart Pyrex mixing bowl, it’s the perfect size!
Pound Cake – You can make your own pound cake (you’ll need a pound of butter, a pound of sugar, and a pound of flour!), or pick one up at the store. Honestly, the cake is not the star of this show, so you don’t need to stress about it!
Ice Cream – Use two different ice cream flavors to create visual interest and flavor contrast inside the baked Alaska. Chocolate and Strawberry ice creams are delicious. but feel free to use your favorites. You could also use Neapolitan ice cream to make things super simple. Homemade ice cream or store-bought can be used.
Egg Whites – Separate the whites of the eggs, making sure not to get any specks of yolk in there. Let the egg whites come to room temperature before whipping them into a luscious meringue.
Sugar – Granulated sugar makes egg whites taste delicious.
Cream of Tartar – This is a stabilizer, and will ensure that your meringue stays whipped.
How to Make Baked Alaska
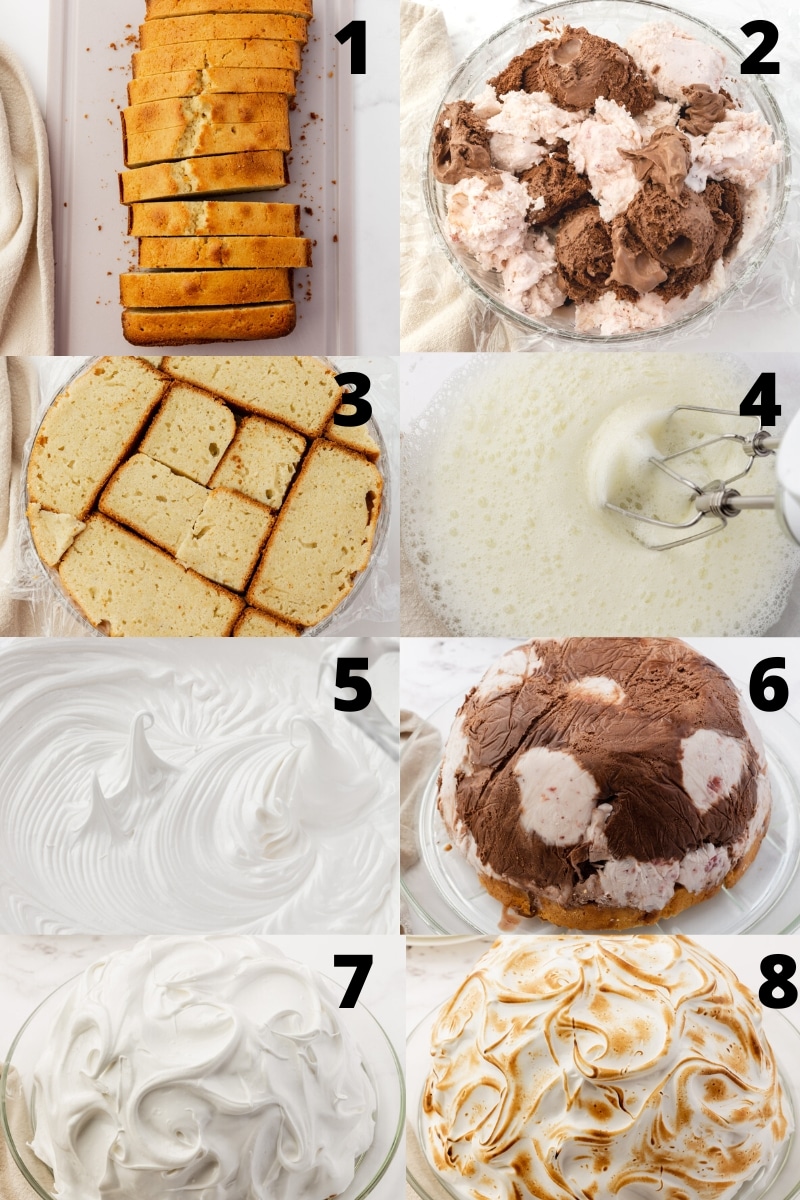
- Slice the pound cake into 1/2-inch slices, and set them aside.
- Spray a 9-inch freezer-safe bowl with cooking spray, then line the bowl with plastic wrap, leaving an overhang long enough to cover the top of the bowl later. Fill the bowl with scoops of chocolate and strawberry ice cream, alternating every few scoops. Smooth the top of the ice cream with a spatula to make it flat.
- Place the pound cake slices on top of the ice cream, trimming the pieces to fully cover the ice cream from edge to edge. You may not need the whole loaf of cake, so save that for later! Cover the cake with the plastic wrap overhang, and freeze the bowl for at least 3 hours, until firm.
- Make the Meringue once the ice cream is frozen solid. Place the egg whites and cream of tartar in a large bowl, and mix on high speed until foamy, about 2 minutes.
- Gradually add the granulated sugar while mixing, and continue to mix on high speed until the meringue is glossy and forms stiff peaks. This should take about 5 minutes.
- Remove the cake from the freezer. Unwrap the top of the bowl, then invert the ice cream cake onto a platter or large plate. Remove the bowl and the remaining plastic wrap.
- Frost the ice cream with the prepared meringue using a spoon or a piping bag.
- Use a kitchen torch to toast the meringue until it’s golden brown.
These numbered steps match the numbered photos above and are for illustration purposes. For the complete list of ingredients and instructions for making baked Alaska, please see the recipe below.
How to Store Baked Alaska
It’s best to serve Alaska Bake right away after toasting the meringue, but you can keep leftovers in the freezer for up to 3 days.
If you’d like to make Baked Alaska ahead of time, the prepared pound cake and ice cream center can be wrapped very well and kept in the freezer for up to a week. Add fresh meringue to finish before serving.
Tips for Making This Baked Alaska Ice Cream Recipe
If you decide to bake your own pound cake, make it in a 9-inch round cake pan so that it’s already the perfect size to fit your bowl.
Don’t toss the egg yolks! All of our French-style ice cream recipes start with egg yolks, so make good use of them and start an ice cream recipe in your ice cream maker while you’re waiting for the baked Alaska to be ready. Toasted Almond ice cream and French Silk ice cream are two of my favorites if you need a suggestion!
Whip until STIFF peaks. If the eggs aren’t whipped enough, you won’t be able to create texture with the meringue. You can create that texture using the back of a spoon, or pipe on the meringue using a large open star tip.
Use quality ingredients. When making homemade ice cream desserts, you’ll want to make sure you are using high-quality ingredients for the best outcome.
Try other ice cream flavors. Be sure to choose two different ice cream flavors that are different colors. Chocolate and strawberry are simple and easy or try mint chocolate chip, red velvet ice cream, or pistachio ice cream with either vanilla ice cream or chocolate ice cream.
Why Doesn’t The Ice Cream Melt in Baked Alaska?
This is the trick that makes this dessert so impressive! Just like fried ice cream, it boggles the mind that the outside of the dessert is warm and browned but the inside is still frozen.
The easiest way to accomplish this is to use a kitchen torch to toast the meringue by hand. This method introduces the least heat to the ice cream and allows it to be unharmed by the fire.
If you don’t have a torch, you can finish baked Alaska in the oven, but it’s trickier.
How To Make Baked Alaska in the Oven
- Start with a parchment-lined baking sheet. After the pound cake and ice cream have been frozen in the bowl, remove and invert onto the parchment, then cover the frozen ice cream dome with meringue.
- Then place the whole thing back into the freezer for at least three more hours. You want it to be solidly frozen when you put it into the oven.
- When you’re almost ready for dessert, preheat your oven as high as it can go, or to 500°F/260°C.
- Pull the Alaska out of the freezer, and place it directly into the preheated oven. Bake for about 4 minutes, or until the meringue is lightly toasted.
Alternatively, you can use your oven broiler, although you may not get the sides of the bombe toasted well enough this way.
More Homemade Ice Cream Dessert Recipes
- Pizookie
- Ice Cream Pie
- Classic Ice Cream Cake
- Choco Tacos
- Brownie A La Mode
- Hot Fudge Sundae
- Semifreddo
- Chocolate Ice Cream Bars
LET’S GET SOCIAL, you can follow us on Pinterest or leave a comment below if you have any questions.
Did you make this Homemade Baked Alaska Ice Cream Recipe? Leave a Comment Below letting us know what you thought and if you added any additional add-ins.

Baked Alaska
Baked Alaska is an impressive and easy ice cream dessert. Layers of cake, ice cream, and toasted meringue come together flawlessly to make this tasty treat.
Ingredients
- 1 loaf pound cake, store-bought or homemade
- 1 quart chocolate ice cream, slightly softened
- 1 quart strawberry ice cream, slightly softened
- 6 large egg whites (about 3/4 cup), at room temperature
- 1 cup granulated sugar
- 1/4 teaspoon cream of tartar
Instructions
- Slice the pound cake into 1/2 inch slices. Set aside.
- Spray a 9-inch freezer-safe bowl with cooking spray. Then, line the bowl with plastic wrap, leaving overhang as tall as the bowl. Fill the bowl with scoops of chocolate ice cream and strawberry ice cream, alternating the flavors every few scoops. Smooth the top of the ice cream with a spatula to create an even layer.
- Place the pound cake on top of the ice cream, trimming any slices as needed, to fill out the entire length of the bowl. You will probably not need the entire pound cake. Cover with the plastic wrap overhang. Freeze the ice cream and cake for at least 3 hours, until firm.
- Once the ice cream is firm, make the meringue. Place the egg whites and cream of tartar in a large bowl. Mix until on high speed until foamy, about 2 minutes.
- Gradually add in the granulated sugar while mixing. Mix until the meringue is glossy and the meringue forms stiff peaks. This should take about 5 minutes.
- Remove the cake from the freezer. Unwrap the top of the plastic wrap from the cake. Place a serving board or large plate on top of the cake and then invert the bowl onto the platter. Remove the bowl and then unwrap the remaining plastic wrap from the cake.
- Frost the ice cream with the prepared meringue using a spoon or piping bag.
- Use a kitchen torch to toast the meringue or place it under the oven broiler for 3-4 minutes. Slice and serve immediately.
Notes
- You can use your favorite store-bought pound cake or a homemade version. If you are baking your own, you can make it in a 9-inch round cake pan that will fit the bottom of your bowl very easily. You can also use brownies for this recipe, too.
- Use two ice cream flavors that have contrasting colors. I used chocolate and strawberry ice cream. Chocolate and mint chocolate chip would also be a great color combination and delicious, too.
- You need to make sure that the meringue comes to stiff peaks so that you can create some texture with the spoon so that you can get those parts really toasted. You can spoon the meringue onto the ice cream or use a piping bag with a star tip. I chose to use a spoon and created swirls with the back of the spoon.
- It's best to serve Alaska Bake right away after toasting the meringue, but you can keep leftovers in the freezer for up to 3 days.
- If you'd like to make Baked Alaska ahead of time, the prepared pound cake and ice cream center can be wrapped very well and kept in the freezer for up to a week. Add fresh meringue to finish before serving.
Nutrition Information:
Yield: 12 Serving Size: 1Amount Per Serving: Calories: 358Total Fat: 13gSaturated Fat: 7gTrans Fat: 0gUnsaturated Fat: 4gCholesterol: 47mgSodium: 200mgCarbohydrates: 57gFiber: 1gSugar: 38gProtein: 6g