How to Make Ice Cream in a Bag
Ice Cream in a Bag is a fun hands-on way to make delicious ice cream using the old-fashioned salt and ice method!
Kids absolutely love making their own vanilla ice cream this way, and learning how to make ice cream in a bag is a very tasty way to learn about science and history too.
This simple ice cream recipe makes enough to share, is made with all-natural ingredients, and is egg-free, nut-free, and gluten-free.
Before there were electric ice cream makers, how did people make ice cream?
Well, historically, people made ice cream using a hand churn that was cooled with ice cubes and rock salt! If you’re old enough, you may have even seen one of these contraptions, otherwise, you can just take my word for it.
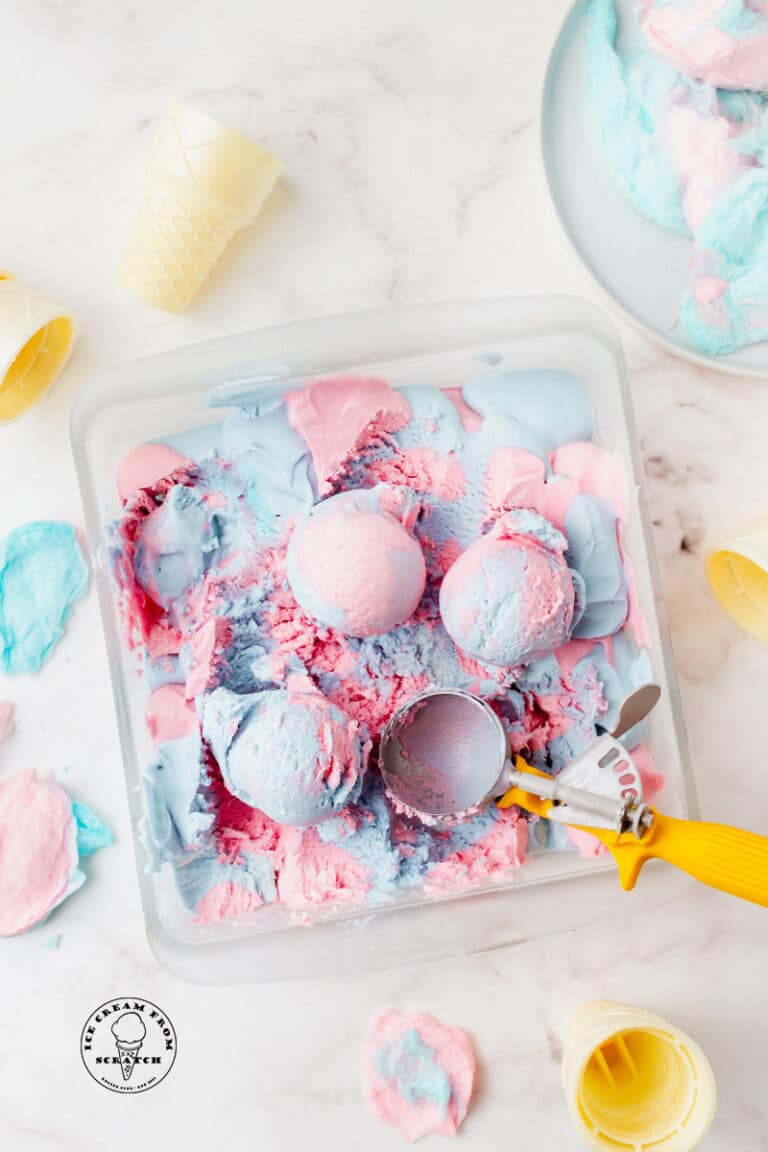
We love making ice cream in our ice cream machine, and we have some amazing no-churn recipes here too like neapolitan ice cream and cotton candy ice cream.
But you don’t need a fancy machine or even a fancy recipe to make ice cream at home when you’re making ice cream in a bag!
Just toss the ingredients in, make a simple salt and ice cooling system, and start shaking, tossing, and rolling the bag around until you get to the finish line.
If Ice Cream in a Bag is your first ice cream recipe ever, I hope you stop back and learn more about how to make more of our homemade ice cream recipes. You won’t believe how amazing fresh ice cream is!
Why You’re Going to Love this Ice Cream in a Bag Recipe
Kids Absolutely Love This! Ok, I think kids love everything about making and eating ice cream, but they get extra invested when they are physically responsible for the churning part.
Once your little ones learn how to make ice cream in a bag, they’ll probably ask you to make it often, so stock up on the ingredients and supplies so you’re ready.
As a huge bonus, ice cream in a bag is a dessert and a STEM lesson in one! As you make this ice cream together, you can teach them about states of matter, endothermic reactions, how to affect the melting point of ice, and more!
I’ll give you some Cliff’s notes on those science terms in a minute, but first, let’s learn how to make ice cream in a bag!
Ingredients in Homemade Ice Cream in a Bag
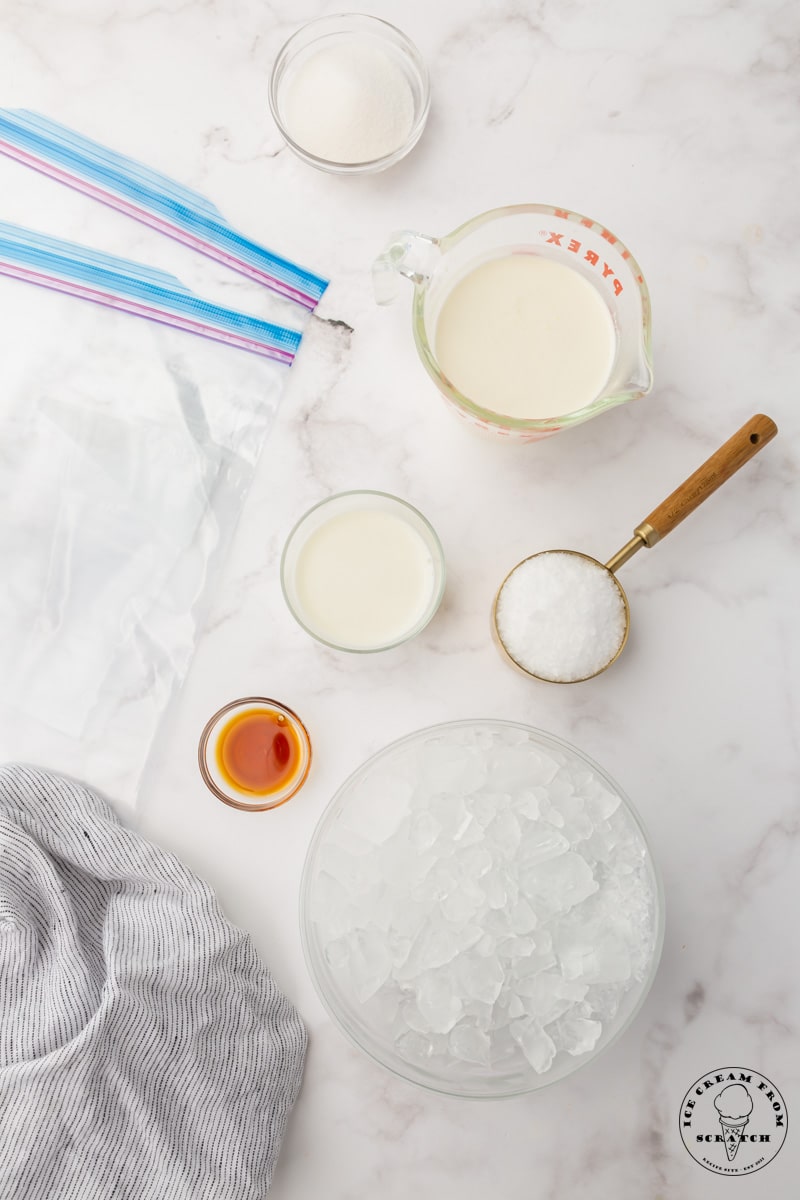
Zipper Bags – You want one gallon-sized bag and one quart-sized bag. The smaller bag will hold the ice cream ingredients, while the larger one holds the salt and ice. Make sure you’re using zipper bags that have good seals, and if you have freezer bags, use those over “storage” bags. They are made with thicker plastic and will hold up to more vigorous manipulations.
For the Big Bag:
Salt – Rock salt is the best choice for making ice cream this way, but it’s not necessary. I’m using kosher salt, and it works just fine! Avoid finely ground table salt. The pieces are too small to do what we need them to do here.
Ice Cubes – Six cups of ice, plus the salt, will cool this ice cream down quickly.
For the Small Bag:
Heavy Cream – All good ice cream recipes are made with heavy cream. Don’t attempt to substitute it, the fat is necessary to make ice cream in a bag creamy and rich.
Milk – Choose whole milk when making ice cream, again, for the fat!
Granulated Sugar – This gives the ice cream sweetness, but also helps to create the best creamy texture.
Vanilla Extract – All great ice cream recipes include vanilla extract because it elevates the simple flavors of milk and cream into something extra special.
How to Make Homemade Ice Cream in a Bag
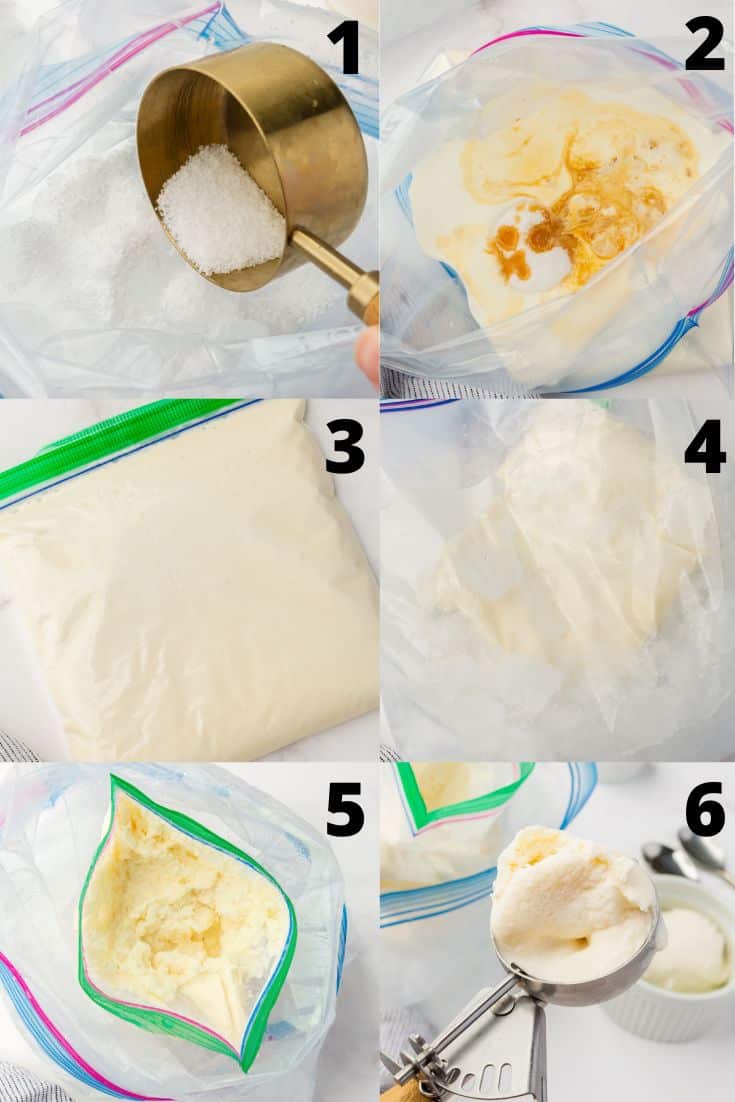
- Add the ice and salt to the gallon-sized bag, and stir together.
- Place the heavy cream, whole milk, granulated sugar, and vanilla extract into the quart-size bag.
- Squeeze as much air out of the small bag as possible, and seal it. Check to be sure it’s sealed well!
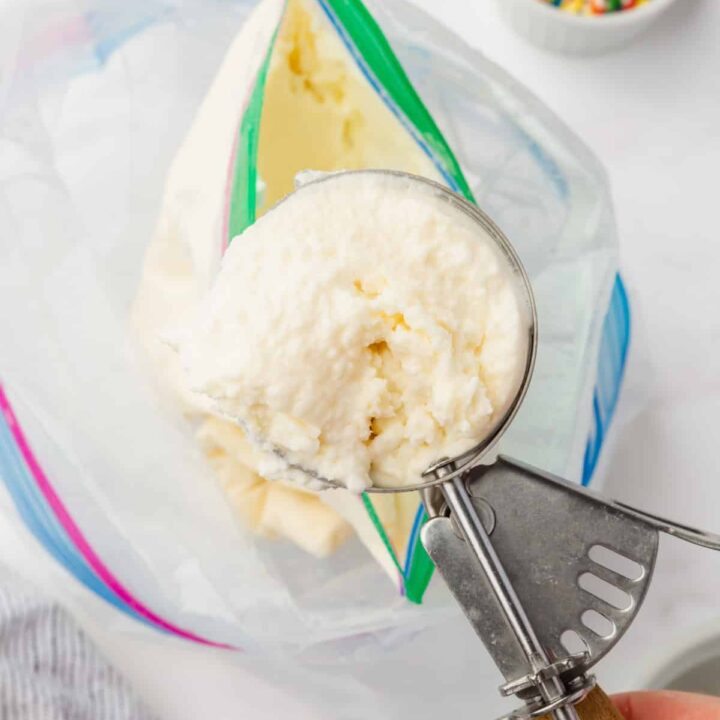
- Place the bag with the ice cream mixture into the bag filled with ice and salt, making sure that the ice is formed around the smaller bag. Close the gallon bag. You now have a fully loaded DIY ice cream machine!
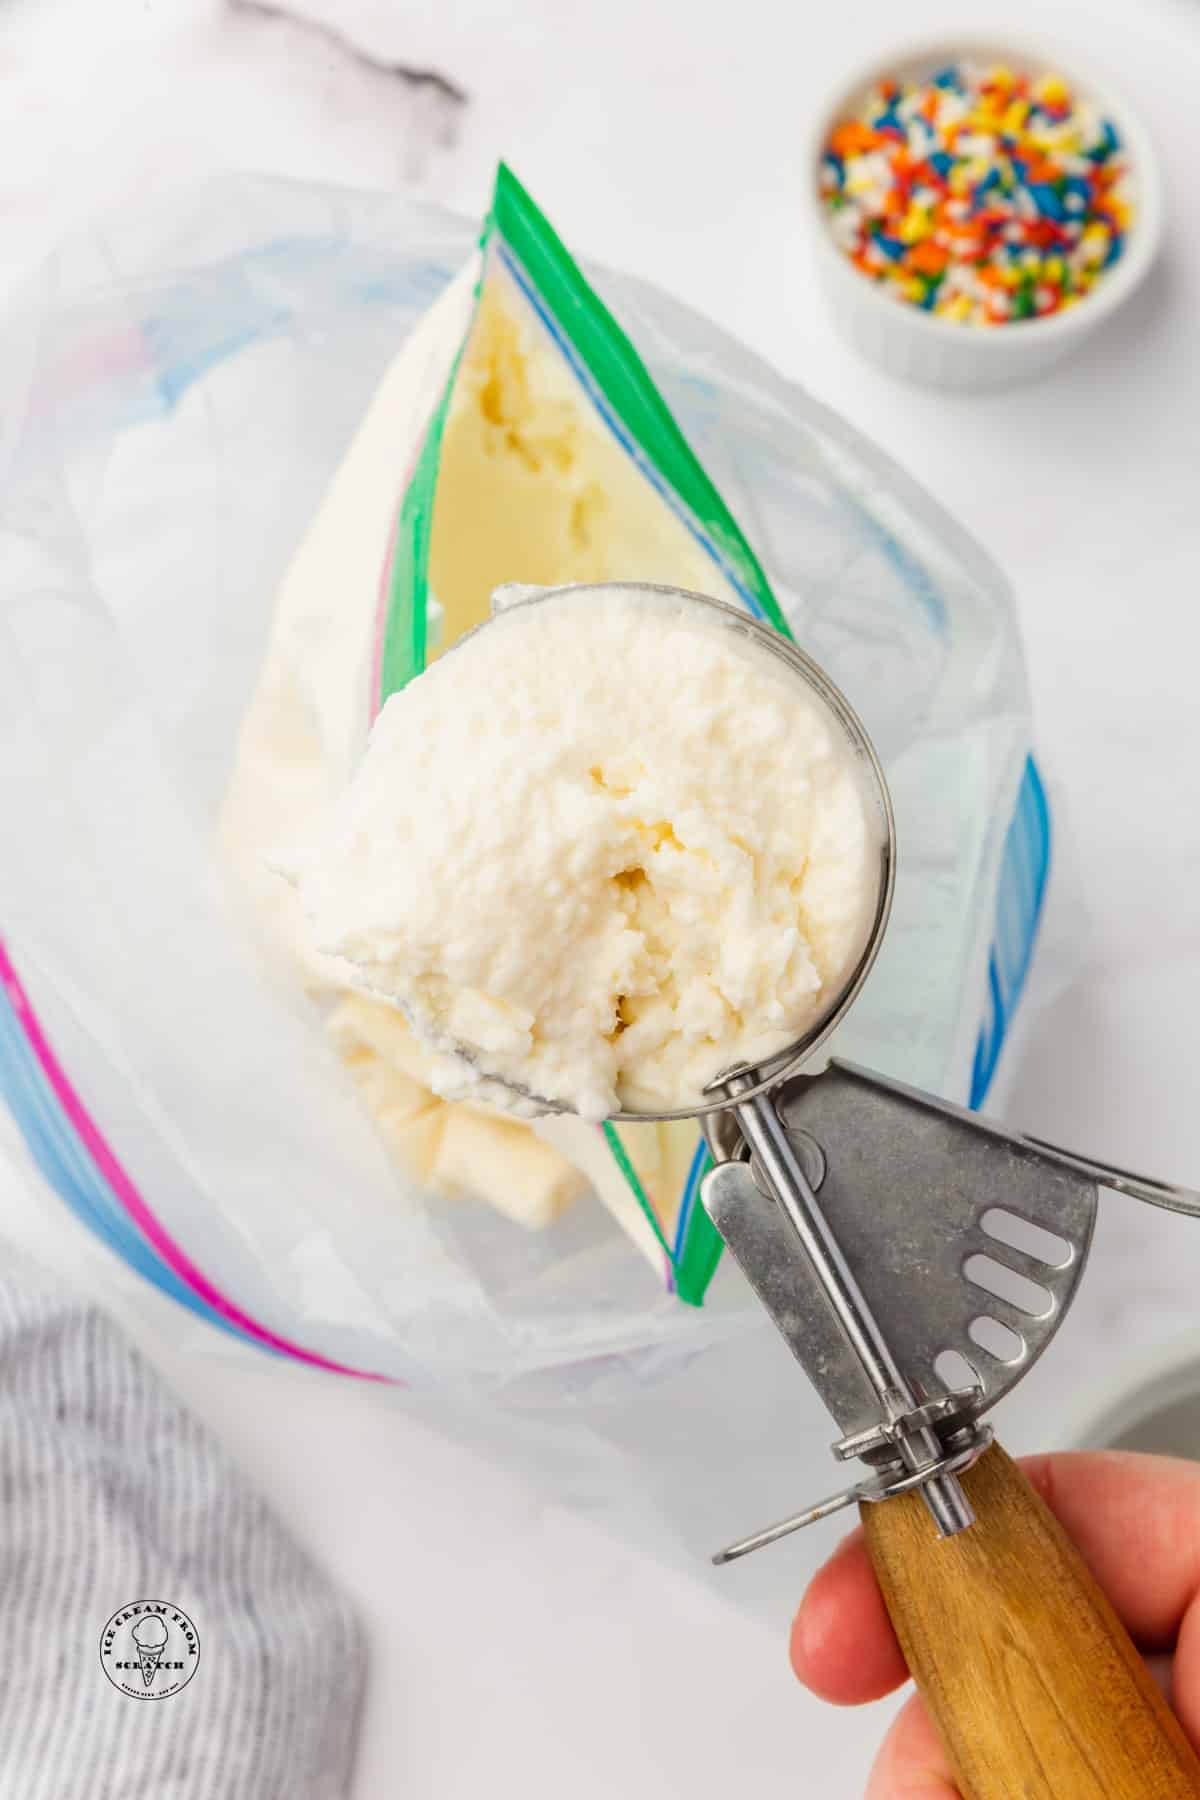
- This is the fun part! Shake, shake, shake the bag. If you have a helper, you can play catch with it. The goal is to move it around as much as possible for at least 5 minutes, or until the mixture has thickened into ice cream.
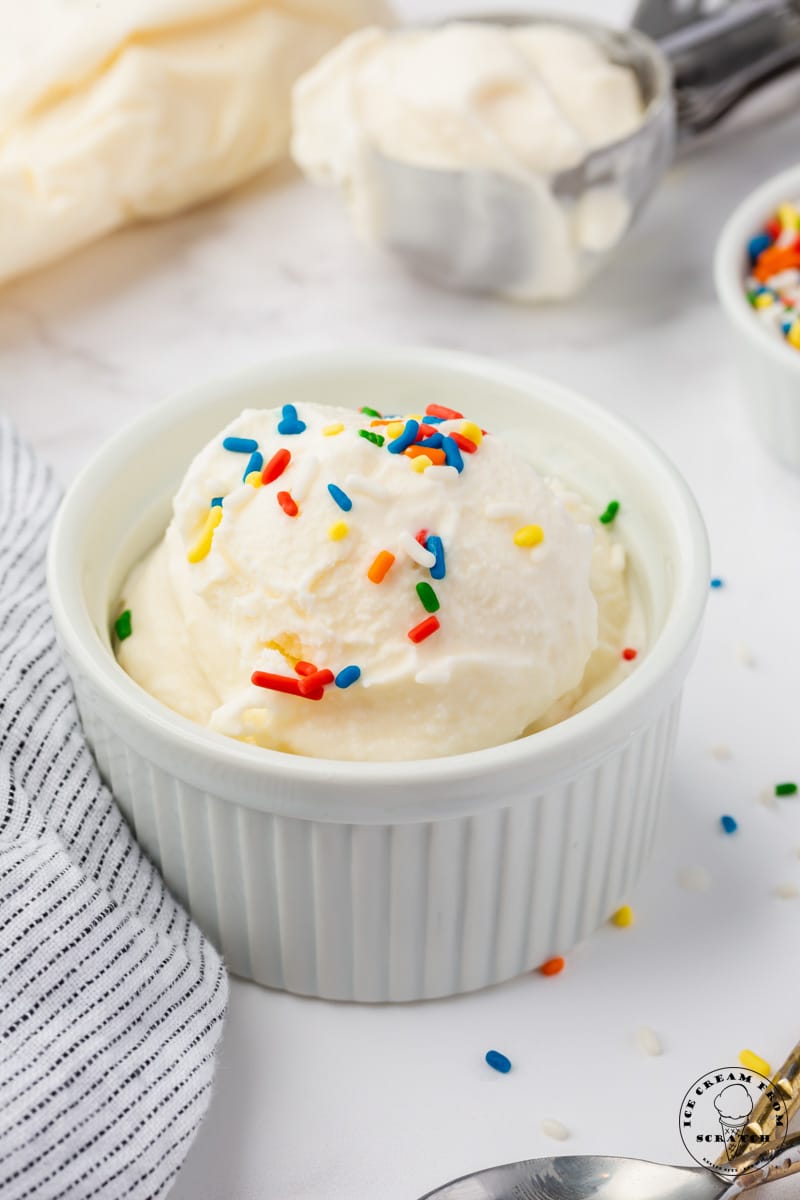
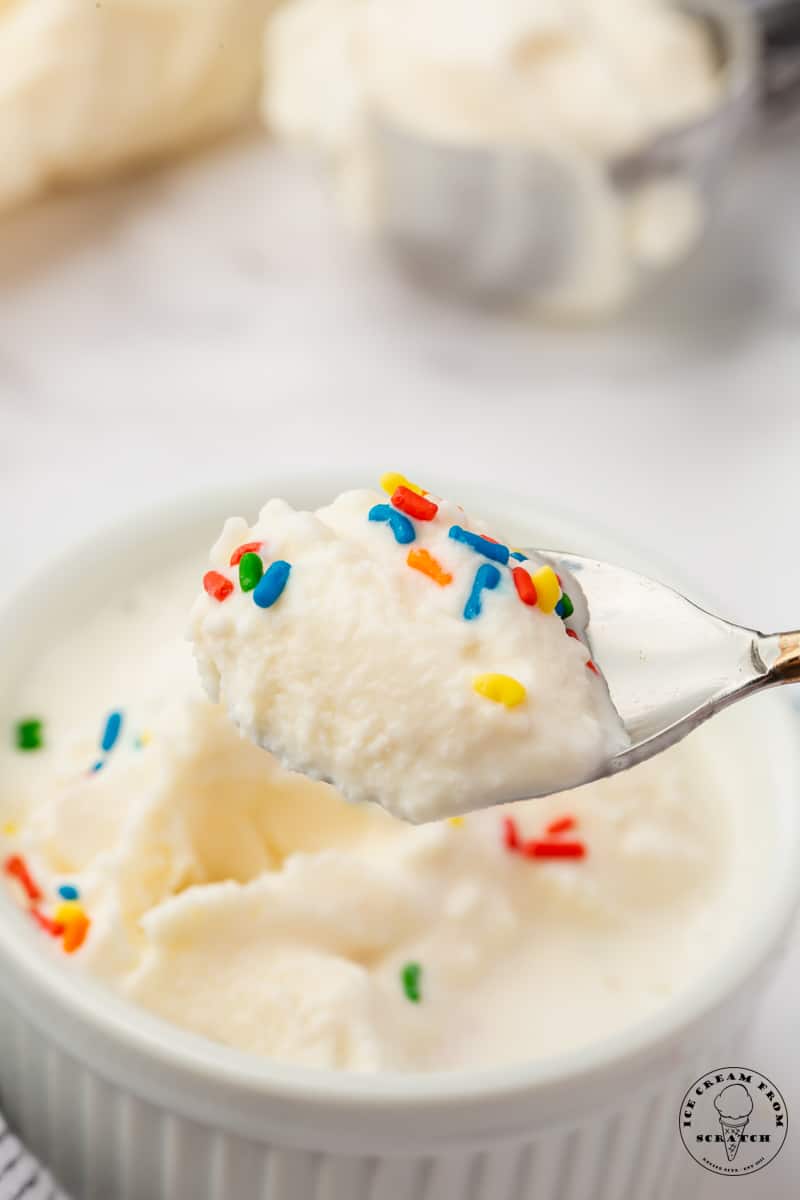
- Serve right away, ideally topped with sprinkles.
These numbered steps match the numbered photos above and are for illustration purposes. For the complete list of ingredients and instructions, please see the recipe below.
Tips for Making Ice Cream In a Bag
Use quality ingredients – When making homemade ice cream, you’ll want to make sure you are using high-quality ingredients for the best outcome.
Chill out – If possible, always start with chilled ingredients. This is important for homemade no-churn ice cream recipes and ice cream maker recipes.
Don’t skimp on the fat – High-fat milk and cream are essential when making homemade ice cream. Opting for a low-fat option often leads to icy ice creams and inconsistency in the texture.
Want to add something? If you want to add additional ingredients to this ice cream, wait until after you’ve finished shaking it. Try cookies, sprinkles, fruit, or chopped candy bars.
Don’t skimp on the sugar – Sugar not only adds sweetness to homemade ice creams, it also helps with the texture. Sugar is essential for the creamy texture of ice cream.
Rinse the bag – The outside of the quart-sized ice cream bag will be salty. Rise it off under cold water before opening and scooping it.
Too Cold? Eventually, the bag might be too cold to hold with your hands. Put on a pair of gloves or cover the bag with a towel, and keep going!
Ice Cream Science Lessons
If you’re making ice cream in a bag with kids, it’s a great opportunity to teach them some new scientific concepts or remind them of ones they’ve learned about in school.
Here are the basics (full disclaimer, I’m not a science teacher, but I DO love learning about ice cream science!):
How do milk, cream, and sugar get turned into ice cream?
You can learn about ice cream and explain that ice cream is made when air is incorporated into the sugar and cream as it’s being frozen. Ice crystals and pockets of air are formed when we shake the ingredients. The more you shake the bag, the more crystals are created.
The ice cream changes states of matter – It starts as a liquid and ends as a delicious, creamy solid.
When we shake the ice cream in a bag, we are creating an emulsion. An emulsion happens when small droplets of a liquid are dispersed through another liquid or gas. Just like salad dressing, you need to shake it up to get the oil and vinegar to join together. In this case, we’re creating an emulsion of fat, ice crystals, and air.
What Role does the Salt Play in Making Ice Cream?
We’re playing with freezing points and melting points. Ice, on its own, won’t be cold enough to freeze the ice cream mixture quickly, so we add salt to the ice to make it extra cold.
Because the salt and ice mixture is so cold, it absorbs energy (heat) from the inner bag of ice cream ingredients, causing it to freeze.
If you find that your ice cream isn’t coming together after 5 minutes, add more salt to the outer bag. This will make the ice colder.
It’s also totally okay to make ice cream in a bag without turning it into a science experiment. Just enjoy your tasty homemade ice cream!
Ice Cream in a Bag Variations
Try using a small amount of any other baking extract in addition to the vanilla to get new flavors.
You can also add a tablespoon of hot chocolate mix or chocolate syrup to make chocolate ice cream in a bag.
For anything else, wait to add it until after the ice cream is ready. Chopped fresh berries are a delicious addition!
This ice cream would be perfect on top of a serving of peach dump cake.
More Homemade No Churn Ice Cream Recipes
These flavors aren’t made in a bag, but they are made without the need for an ice cream maker!
- Superman Ice Cream
- Neapolitan Ice Cream
- Banoffee Pie Ice Cream
- No Churn Chocolate Ice Cream
- Cookies and Cream Ice Cream
LET’S GET SOCIAL, you can follow us on Pinterest or leave a comment below if you have any questions.
Did you make Ice Cream in a Bag? Leave a Comment Below letting us know what you thought and if you added any additional add-ins.
How to Make Ice Cream in a Bag
Learn How to Make Ice Cream in a Bag! It's a fun hands-on way to make delicious ice cream using the old-fashioned salt and ice method.
Ingredients
- 6 cups crushed ice
- 1/2 cup rock salt or kosher salt
- 1 cup heavy cream
- 1/2 cup whole milk
- 1/4 cup granulated sugar
- 1 teaspoon vanilla extract
- 1 gallon-size zip top bag
- 1 quart-size zip top bag
Instructions
- Add the ice and salt to the gallon-sized bag. Mix together.
- Place the heavy cream, whole milk, granulated sugar, and vanilla extract into the quart-size bag.
- Squeeze out as much air as possible and close the bag completely. Shake to combine.
- Place the bag with the ice cream mixture into the gallon-sized ice bag, making sure that the ice is formed around the ice cream mixture bag. Close the top of the bag with the ice in it.
- Shake the bag for 5-10 minutes, until the mixture has thickened into ice cream.
- Serve immediately.
Notes
Nutrition Information:
Yield: 6 Serving Size: 1Amount Per Serving: Calories: 182Total Fat: 15gSaturated Fat: 10gTrans Fat: 0gUnsaturated Fat: 4gCholesterol: 47mgSodium: 9512mgCarbohydrates: 10gFiber: 0gSugar: 11gProtein: 2g
What a simple and brilliant idea, Making ice cream in a bag is such a fun and interactive way to create a homemade treat while also learning about the science behind freezing. It’s a perfect activity for kids and families, making it both an educational experience and a delicious reward at the end. I especially appreciate the tip about using gloves or wrapping the bag in a towel—shaking the ice and salt mixture can get surprisingly cold, and this small detail makes the process much more enjoyable. The best part is how customizable this method is; you can experiment with different flavors, mix-ins, or even try using alternative sweeteners for a healthier twist. Such a fantastic idea for summer afternoons, parties, or even just a fun weekend project.